Wednesday, December 31, 2014

RF&F - Big Bethel

Last night the Baron Baron's Blog opened the doors to his home for a night of holiday gaming and cheer. We ran the first scenario out of the Regimental Fire & Fury vol. 1 scenario book. This is the first time I have been a part of a game using one of the RF&F scenarios.  Before I proceed,  I must say RF&F is probably my favorite of all the ACW rulesets I've played with Black Powder being a close second (because of its simplicity). I love the work Rich Hasenauer and crew has done on the rulebook and both scenario books. Since I have been a part of the Basement Generals group for a little over 3 years now (wow, time flies), we've played RF&F a half dozen times or so and it seems there has been a level of frustration each time. I believe a lot of this has to do with the complexity of the modifiers, however this night Union Forces under the command of Brig. Gen. Ebenezer Pierce would be plagued by less than desirable rolls and too many green troops. Adding to their woes would be a a single Confederate gun on the Union left flank refusing the yanks from organizing an assault. All in all the battle followed the events of June 10, 1861 with the yanks being repulsed not to return to the Virginia peninsula until 1862.

The field

 Big Bethel Church

Union forces attempt to organize at the blacksmith's shop

 Keep pouring it on em, boys!

 A small CS cavalry unit heads out to scout the left flank

 The 5th N.Y. "Red Devils" emerge from the tree line and attempt to move on Brick Kiln Creek
 
Rebel cav take on casualties

Thursday, December 25, 2014

Monday, December 15, 2014

More 25/28mm Terrain


In addition to my other terrain projects, I decided to add a bunch of fencing and walls too. Actually, I made these fences a few years back but upgraded the bases. I've had the walls too, but decided to add riders to many of them. A while back I purchased a mold kit from Hobby Lobby, so now I can make as many of the stone walls as I want. The original pieces were scratch built as well with bakeable clay and gravel.  I figured I'd need a ton of this stuff so I made around 12 linear feet of both.


Scratch Build 25/28mm Cornfield


Who doesn't need a cornfield? I figured I'd better somehow come up with one - so what do you know, I made one. Actually this was another very easy project to complete, it just took a little time and patience. To begin, I cut several pieces of Sintra into 50mm x 50mm and 50mm x 90mm pieces.


After, I used Liquitex Flexible Modeling Paste to texture and sprinkled with playbox sand.


I then used a dark brown acrylic to basecoat and drybrushed a very light-gray.


After I simply drilled holes and glued in cut pieces of Christmas greenery and painted the husks.


I like the flexibility of the two different sized pieces to accommodate even or odd based units.


Sunday, December 14, 2014

McPherson Barn Semi Scratch-Build

As I continue to roll towards hosting a game every now and then, I have been eying a McPherson's Ridge RF&F game to baptize a break-down 9' x 7' table I have nearly completed. In addition to a gaming table, I've been amassing as much terrain as possible to be ready. My latest creation is a scratch-build 25mm reproduction of the McPherson barn that was made famous by the first day's fighting at Gettysburg. I couldn't find anything online in the way of something like a resin barn. I got the idea to build my own from some of the very nice foamcore structures the Baron has in his collection. This project started last week by simply sitting down and measuring out the wall panels on some graph paper. The structure is made of foamcore. The wooden planks are craft sticks, the stonework is cut from adhesive Micro-Mark sheets, and the roof is cut from Paper Creek shake shingle sheets.  All together, I have about 4 hours tied up in it. As easy as this was to build, I'll probably build some more historic buildings down the road.


Friday, October 24, 2014

Bolt Action Plastic U.S. Rangers


A few months ago I purchased a box of these little dudes more out of curiosity than real need for more World War II troops. For the most part I like Warlord Game's Bolt Action miniatures. All of the pictures I'd seen online of the finished product showed a very nice looking platoon-size unit with tons of possibilities for poses.


I have some experience with Perry's plastic ACW line, so I had an idea what I was in for. The first thing I would say to someone contemplating the purchase of any plastic minis where there is "some assembly required" would be this - plan on spending a decent chunk of time just prepping for the priming stage. The plastic-to-plastic assembly is easy enough with plain old Testor's modeling cement, but the metal-to-plastic assembly can be a little trickier. I would recommend fast drying superglue for plastic to metal. The set comes with a lot of cool accessories that allows for each model to have a truly unique look. Included are some metal heads that are supposed to portray many of the characters in the Saving Private Ryan movie. This could be up for debate, but they do look good.As for the unit selection, I chose the 29th Infantry Division because the patches are easy to hand paint and they would work well with an Omaha Beach scenario.

Once primed and ready for basecoating, these are a breeze to paint.  Personally, I enjoy dumping a bunch of little guys out a bag that require minimal prep work and on to painting I go, however, I can't say I wouldn't give another box of Bolt Action plastics a shot.


Saturday, October 4, 2014

Dave Graffam Paper Terrain

I promised a while back to talk a little bit about some downloadable paper terrain kits produced by Dave Graffam Models.  I really like these kits a lot. They are very reasonably priced (about $2 each on average), offer tons of detail, and many have multiple layers allowing you to customize to your preference. The only downside that I have found is the time it takes to build. I'm guessing on average you will spend a few hours on a kit sized like the stone church you'll see below (I use these for 25/28mm, so less time would be required for smaller scales).

The method that has suited me is to print on 8.5 x 11 copy paper and use as skins I glue to black foam core (I use 3M spray adhesive but I imagine a thin film of white glue would do just fine).  I then cut my pieces and use super glue and butt joints to assemble.

These kits can be found on Wargame Vault (www.wargamevault.com) and there are freebies every now and then.


Tuesday, July 29, 2014

Summer Work

It's been a pretty busy summer with all of the kids' activities and vacations, however, I have managed to make progress on a few small projects. Starting with my trench project, I have continued with terrain that while primarily for WW2, I suppose much of it could serve as ACW pieces too.

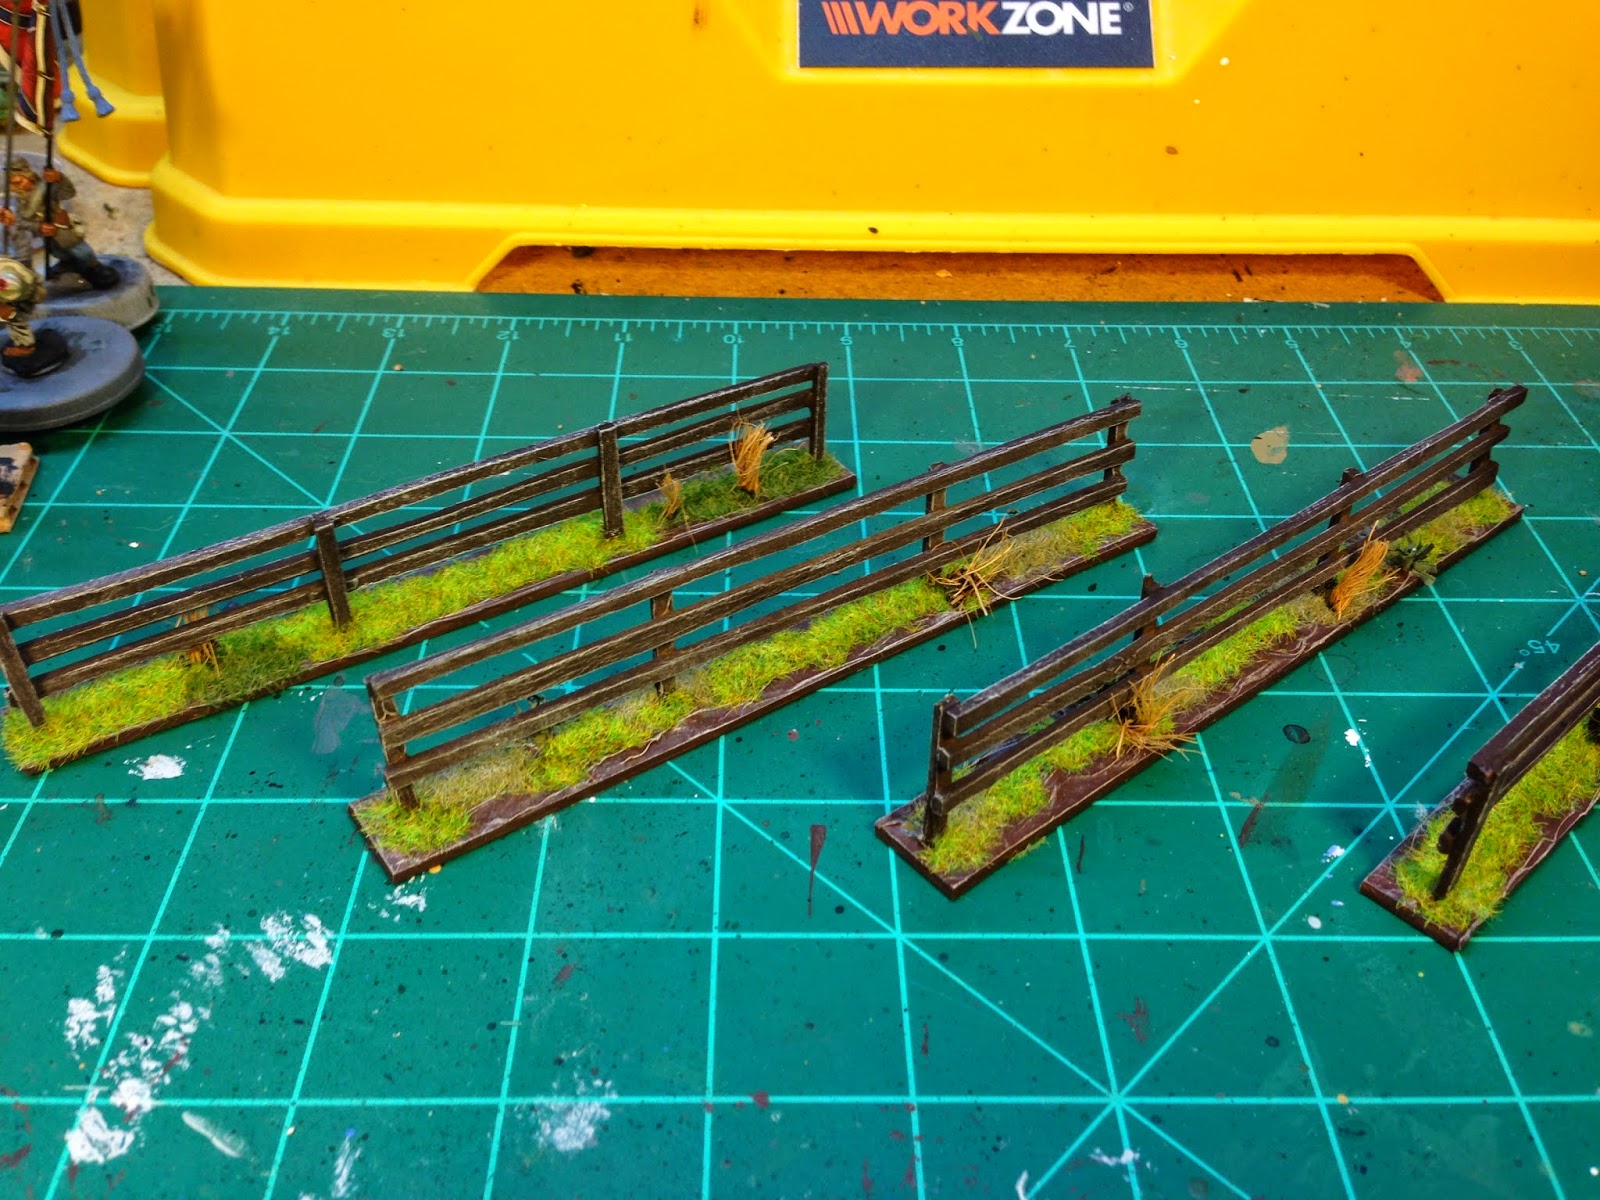
I wanted to make some slender foliage pieces that could serve as tree lines for dividing land parcels or more hedgerows (as I need a lot more of these).  Here's what I've come up with in relatively short order:


These were made by cutting pieces of Sintra and simply PVAing sand to them, painting with a brown basecoat, and drybrushing with Hippo Gray. It was a Woodland Scenics and hot glue gun from there. I sprayed them down really good with WS scenic cement as well.

I also decided to add to the few WW2 ruin pieces:


I absolutely love the Dave Graffam kits. Some of these pieces are made from one of  his small ruin kits, but a few I custom made from another of his kits. The nice thing about his stuff is if you have the time and patience, they are extremely affordable, require little painting (none if you're not picky like me), obviously very light-weight, and most are customizable, so the possibilities for what you can create with a single kit are very broad.

More ruin pieces I made with Sintra bases, light talus and sand, craft sticks, and small bricks I made out of scrap pieces of foam-core:


 In a previous post I mentioned I had no intention of painting any this summer, but I got my hands on a box of Bolt Action plastic U.S. Rangers and decide to tinker a little. I think these 29th I.D. troops will fit in nicely with the 101st and 2nd Rangers I already have:


Wednesday, June 25, 2014

Trench Build Complete!

After about three weeks of work the trenchworks are complete and table ready. With the exception of them being a bit angular (again, I plan to make to make some additional pieces to break up the lines), I am very happy with how this project turned out. In the future instead of piecing together each section like I did, which was a lot of work, I will draw out the entire system on one or two pieces of foam and cut the individual sections after they've been glued to the Sintra and shaped.


Gluing down the shoring and planking.


Stained wood. For this I used a 10:2 mixture of black magic wash and burnt umber ink.


 Shoring and planking dry brushed with Ceramcoat Hippo Gray and flocked.

Finished!


I suppose I could use these for ACW late war stuff.


Thursday, June 12, 2014

Trench Build Pt. 2

My trench project is going quite nicely and I already have ideas for future pieces such as more turns, gun emplacements, and command emplacements.  I have moved on to coating all the sections in a slurry of Durham's Water Putty, saw dust, and a mixture of dirt and small pieces of gravel swept up from my garage floor.


Sections with dried Durham's slurry


After the Durham's had dried (a few hours), I painted with a sample pint of brown acrylic wall paint I'd found on the clearance  shelf at Home Depot.  In addition, I sprinkled the floor of each section with the stuff I found on my garage floor. Most of this will be covered by planking, however I thought it would give a nice look for any dirt peeking through the planks. You can see a definitive styrofoam look to the walls, but this will all be covered in shoring. I have kicked around wattle fencing, but planking will be much faster and it'll look good enough for my purposes.


Stay tuned for drybrushing, planking/shoring, and flocking.